Blog
Installing and trying out the lost UNIX V4 - 25.12.2025
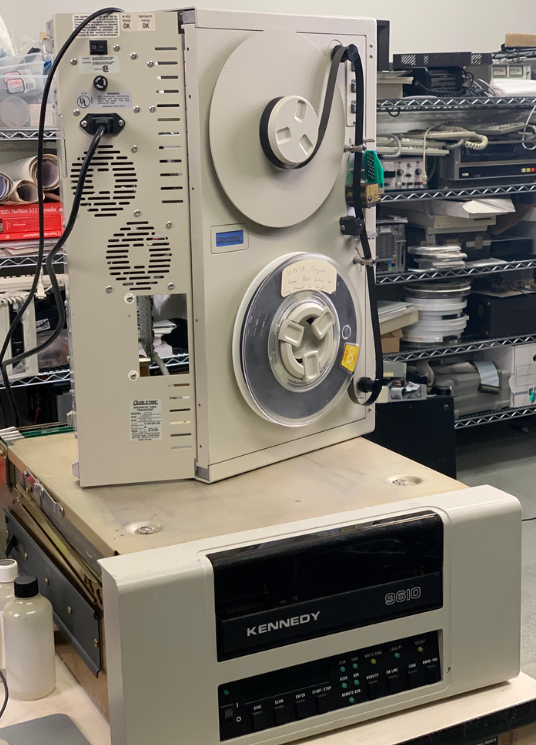
When I read the Register article about the recovery of an UNIX V4 tape, lost to time until a month ago, and saw that not only did they recover the files but also made it available to download, I knew I had to try it. UNIX V4 (Fourth Edition, I’ll use UNIX4 form now on) was released in November 1973 and was the first UNIX that had the kernel written in C, the programming language that derived from B. Besides the C kernel, minor changes were made regarding UNIX 3 (which implemented pipes). The OS was only supported on a PDP-11/45 which was probably used by Ken Thompson and Dennis Ritchie to develop UNIX in C (I did not find any sources on this, but I assume regarding the compatibility, that it was coded and run on a PDP-11/45).
Installing UNIX4 and first impressions
To install UNIX4 we can follow the steps in the README on squoze.net about UNIX4. First we need the simulator for historic computers, most distributions have a package for it, I was able to simply install the Arch-Package with pacman:
sudo pacman –Sy simh
We then need to download the files mentioned on the top of the README:
· unix_v4.tap
· bootstrap
· disk.rk
· unix_v4.tar
· install.ini
· boot.ini
We start the simulator with the supported hardware and the installation file as argument:
simh-pdp11 install.ini
Now we can install UNIX onto the disk with the following commands:
mcopy
'p' for rp; 'k' for rk
k
disk offset
0
tape offset
75
count
4000
Now we can stop the simulation with CTRL+E and then CTRL+C to quit SimH. To save a restore point simply type (inside the simH console) SAVE file_name, to restore type RESTORE file_name. Now we restart SimH with the boot.ini image. Type k and then unix to load and run the unix kernel.
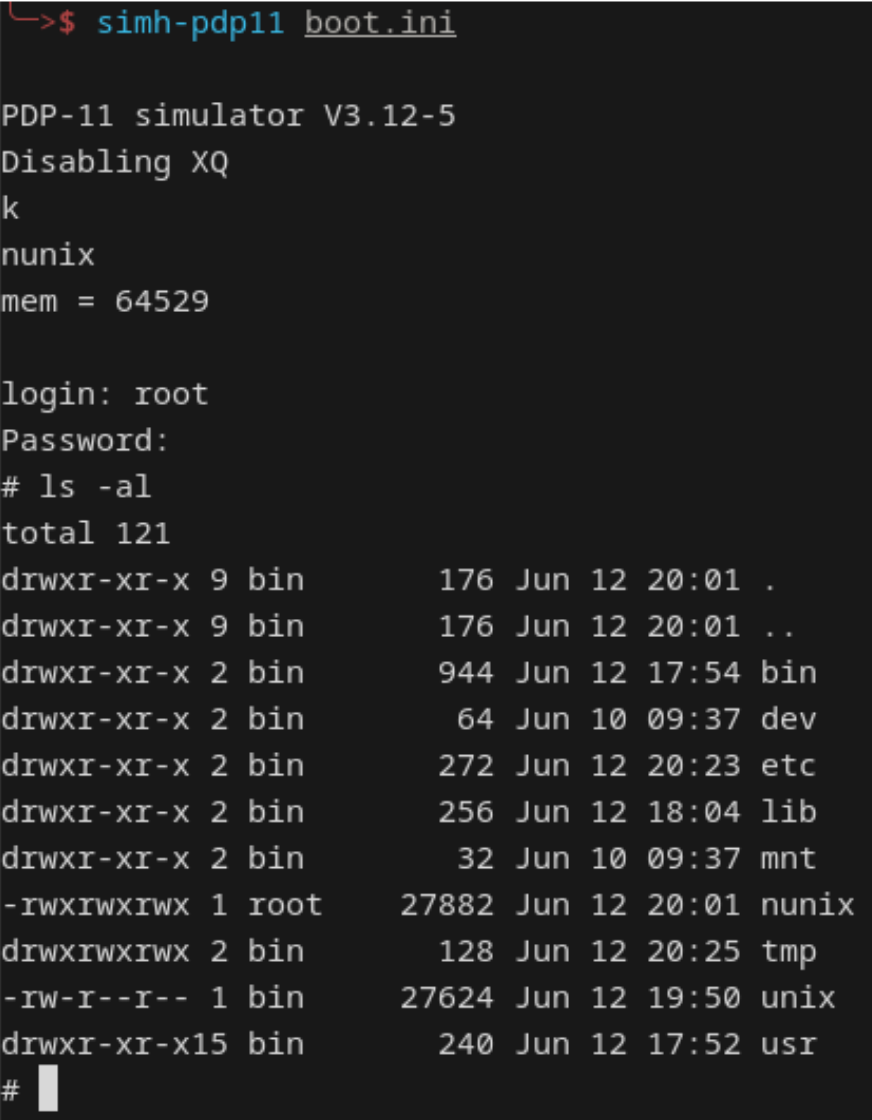
simh-pdp11 boot.ini
Now we are inside UNIX4, running ls -al shows the directories and when you are a Linux user you will already feel kind of at home (even if there is no home directory yet).
As a first thing to do, we can rebuild the kernel (not needed but interesting and fun to do). To do this we need to build three scripts. For this we can use ed, the line-oriented text editor of UNIX. When you used sed, vi or vim before you will already be a bit familiar with it, we will later on use it also to write and compile some C code. First we need to traverse into the /usr/sys/ directory, instead of cd we need to use chdir.
chdir /usr/sys
Then to create a file named run we open ed with the file name as argument
ed run
Now type a and hit enter to be in APPEND mode, now you can copy and paste the script lines into run.
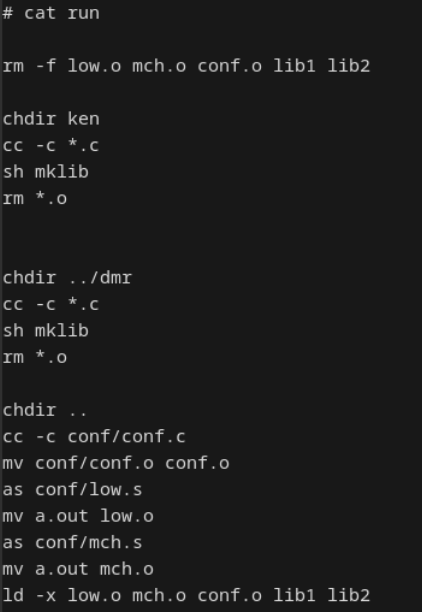
rm -f low.o mch.o conf.o lib1 lib2
chdir ken
cc -c *.c
sh mklib
rm *.o

chdir ../dmr
cc -c *.c
sh mklib
rm *.o

chdir ..
cc -c conf/conf.c
mv conf/conf.o conf.o
as conf/low.s
mv a.out low.o
as conf/mch.s
mv a.out mch.o
ld -x low.o mch.o conf.o lib1 lib2
To go back to normal mode hit enter and type . and hit enter again, now type w hit enter, q and hit enter again (see the long history vim has), You now have a file called run that has the shell script in it, to see the content we can use the cat command:
Now do the same for the file /usr/sys/ken/mklib
ar r ../lib1 main.o
ar r ../lib2 bio.o
ar r ../lib1 alloc.o
ar r ../lib1 iget.o
ar r ../lib1 prf.o
ar r ../lib1 rdwri.o
ar r ../lib1 slp.o
ar r ../lib1 subr.o
ar r ../lib1 text.o
ar r ../lib1 trap.o
ar r ../lib1 sig.o
ar r ../lib1 sysent.o
ar r ../lib1 sys1.o
ar r ../lib1 sys2.o
ar r ../lib1 sys3.o
ar r ../lib1 sys4.o
ar r ../lib1 nami.o
ar r ../lib1 fio.o
ar r ../lib1 clock.o
And for the file /usr/sys/dmr/mklib
ar r ../lib2 tty.o
ar r ../lib2 malloc.o
ar r ../lib2 pipe.o
ar r ../lib2 cat.o
ar r ../lib2 dc.o
ar r ../lib2 dn.o
ar r ../lib2 dc.o
ar r ../lib2 dn.o
ar r ../lib2 dp.o
ar r ../lib2 kl.o
ar r ../lib2 mem.o
ar r ../lib2 pc.o
ar r ../lib2 rf.o
ar r ../lib2 rk.o
ar r ../lib2 tc.o
ar r ../lib2 tm.o
ar r ../lib2 vs.o
ar r ../lib2 vt.o
ar r ../lib2 partab.o
ar r ../lib2 rp.o
ar r ../lib2 lp.o
ar r ../lib2 dhdm.o
ar r ../lib2 dh.o
ar r ../lib2 dhfdm.o
The directory names ken and dmr are the working directories of Ken and Dennis, I assume this means the code written inside those directories is the code that each of them wrote for UNIX4. It is such a cool thing to view the different C-Files in these directories and look at C code form 1973, one of the first kernel files that will form and influence the history of computing and we see and feel them still today in every Linux distribution. Many commands are still present inside Linux today, as we will see later on when we got to explore UNIX4. Now you can go to the /usr/sys directory and run the script with sh run. The new kernel is now assembled as the a.out file, move it to a new directory named nunix and run a few times sync, to refresh the volatile memory and permanent storage:
mv a.out /nunix
Sync
Sync
Sync
Now end the simulation with CTRL+E and restart the simulation (inside the simH console, if you exited completely restart simh with the boot.ini file) and run UNIX with the newly compiled kernel (nunix) as follows
b rk
k
nunix
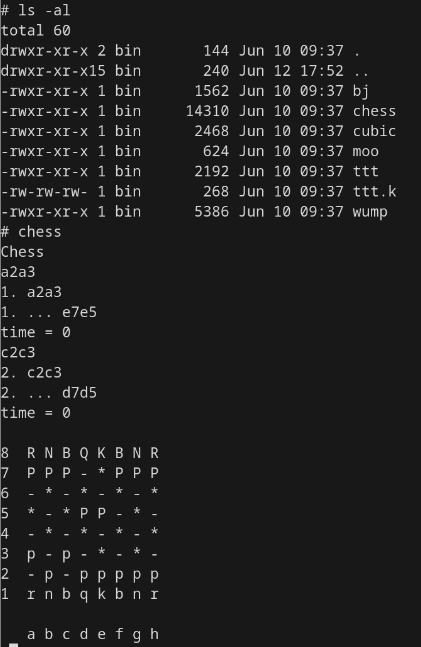
First thing we can do is checkout what commands are implemented by listing the content of the /bin directory. We already see many familiar commands when you are used to using the Linux terminal, like echo, ps, as, ar, mkdir, chmod, chown and many others. But, as you will see when using UNIX4, they sometimes handle a bit different than their modern counterparts. Also, I am not able to use backspace to correct typos in commands, which is a bit annoying but maybe fixable, future problem to solve. First, of course, we go into the /usr/games directory and play some good UNIX Chess (I did not found out how to quit the games, by pressing CTRL+D you can crash them to escape).
Now to the fun part, writing a C program inside UNIX4 with the C-Compiler (cc command). First we need to get used to the ed editor, as it is a bit confusing (at least for me) to have a line based editor and not a normal editor like vim or nano. First let's make us a directory to work in with mkdir /usr/sys/code and traverse to it with chdir /usr/sys/code, then we start ed with ed hello_world.c. Inside ed we can use different commands and modes to edit our file, one of the commands is substitute which can be used to find and replace substrings, see where the sed command has its name and syntax from?
But lets first get around basic navigation of UNIX ed (it is slightly different to the GNU ed), to do this we can use the UNIX4 manual .To print lines of the file, let’s say line 1 to 4, we can tell ed this with 1,4p to append (like insertion mode in vim, but appending to end of file) we can type a. To edit a line we can type the line number and hit enter, this shows the line, then we can substitute the line with s/REGEX/REPLACE_STRING/, deleting a line is done with 3d. You can see the pattern that is used, it is where sed got its syntax from.

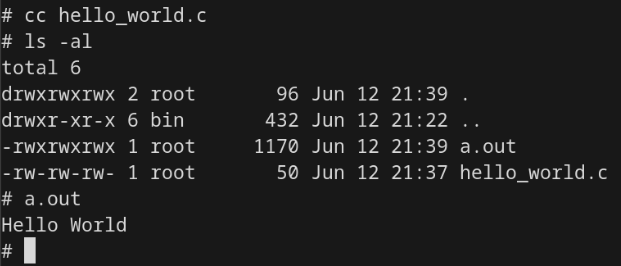
Now that we have our hello world (without including the stdio.h as printf seems to be included in the base C UNIX4 uses), we need to compile it, for that we use cc hello_world.c, this gives us an a.out file that we can run and we have a “Hello World” inside our UNIX4 terminal!
This was my short, but certainly not finished, dive into UNIX4, I will go on to see what else one can do inside it and how limited the early C was. Overall it is a fun and exciting thing, to run and work inside an operation system from 1973, especially because you can see the legacy of UNIX. To be semi-familiar instantly, simply because Linux is so close related to it, is an interesting experience and definitely worth a try!